Hospitality-grade floor protection · Ships in 1–3 business days · 90-day limited warranty
Hospitality-grade floor protection · Ships in 1–3 business days · 90-day limited warranty
You pull a chair out from the table and hear that scrape. This furniture glides guide ends it. Glides are the small discs that go under your furniture legs so they glide instead of scratching on any smooth, hard floor.
Specified by hotels, restaurants, and universities · Aligned with NWFA guidance for hardwood
Every furniture glide is one mounting method (nail-on or self-adhesive) and one surface (Smooth Glide PA6 or Anti-Slip rubber). Answer two questions and you know which one is yours.
1 Mounting method
If solid wood legs
Strongest mechanical hold. A zinc-plated steel tubular rivet drives into the wood with a rubber mallet, no glue, no curing.
If metal, plastic, or no rivet holes
For metal, plastic, hollow tube, antiques, and rentals. EHBF acrylic foam tape presses on in 30 seconds, no holes.
2 Surface material
Got both answers? You know exactly what to buy. Next, make sure glides suit your floor type, then measure your legs for the right size. Or skip ahead and browse the full lineup.
Furniture glides are made for smooth, hard floors. If your floor is polished or sealed, glides protect it. If your floor is carpet, rough, or unsealed, glides are not the right product. For broader floor-care guidance, the National Wood Flooring Association publishes maintenance standards for hardwood.
Aligned with NWFA guidance: our PA6 Smooth Glide surface is a soft fiber face made for furniture contact on hardwood floors.
For carpet, area rugs, AND rough hard floors: use Furniture Slides instead. The hard ABS surface on slides handles textured tile, slate, stamped concrete, and other abrasive floors that would wear through a glide’s PA6 fiber.
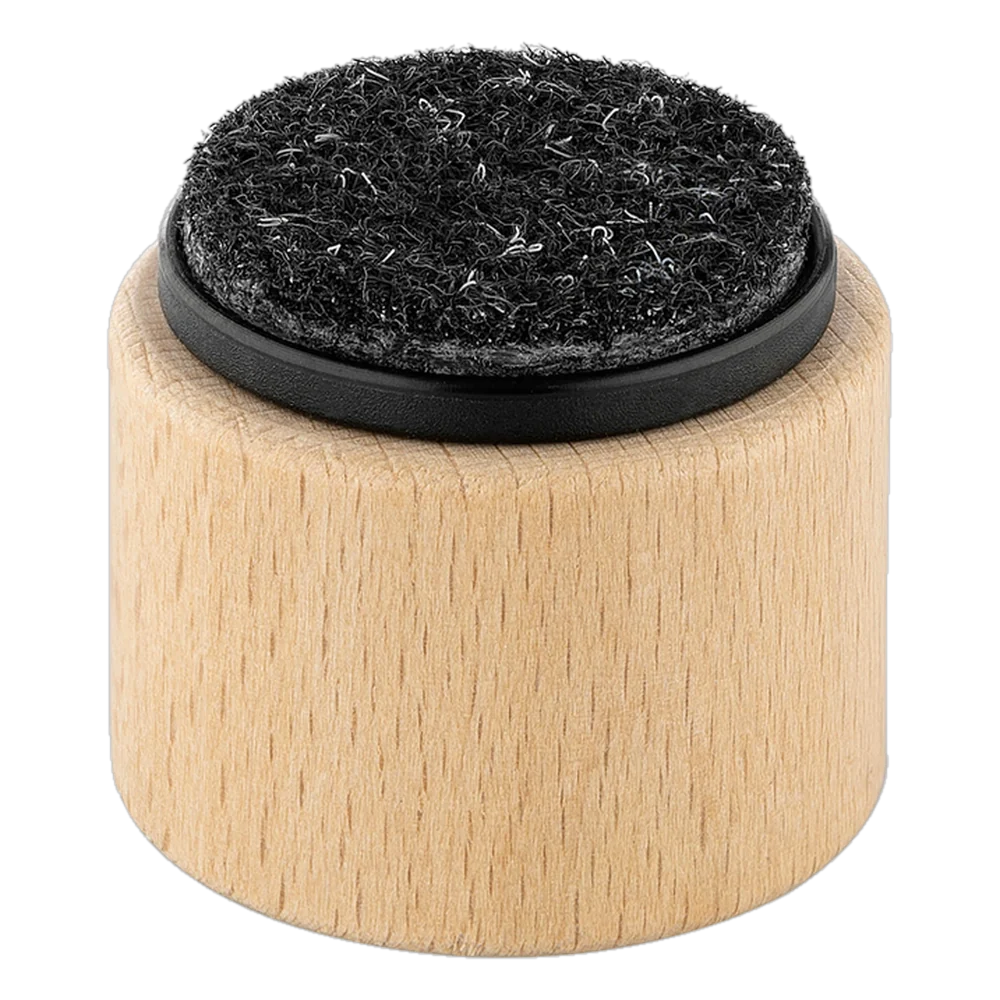
If your legs are solid wood and the piece gets pushed around every day, this is the hold you want. The rivet grips the wood mechanically, so there is no glue to cure and nothing to peel later. You tap it in and it is done.
Best for: solid wood furniture you own that moves often. Dining chairs are the classic case.
Use nail-on glides when
✓ Furniture legs are solid wood and you own the furniture
✓ The piece moves frequently under load (dining chairs, desk chairs, bar stools)
✓ You want a mechanical hold rather than an adhesive bond
✓ You don’t mind a small rivet hole in the bottom of each leg
Nail-on specifications
Available shapes: Round, square, rectangular
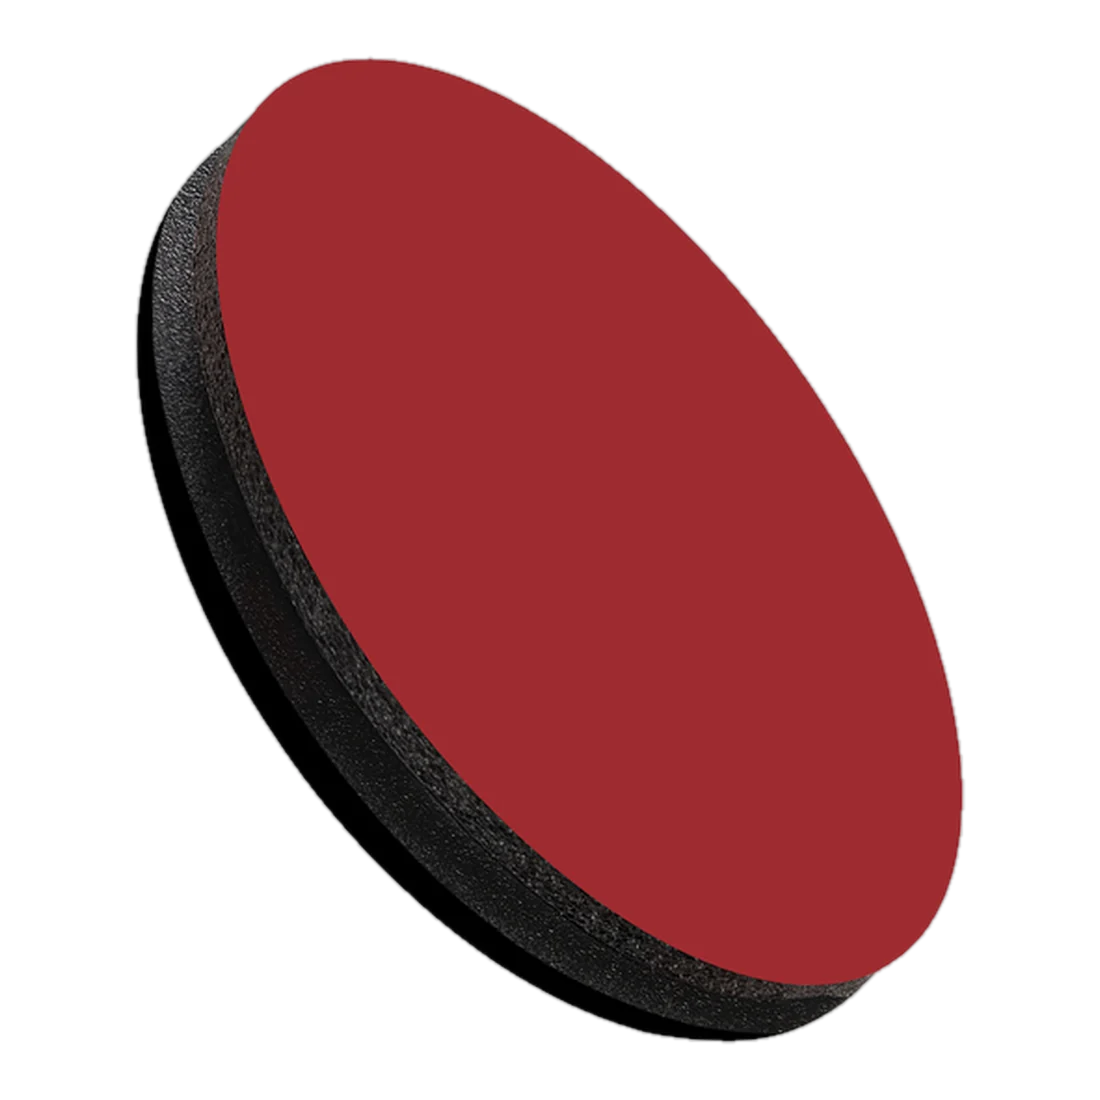
Available surfaces: Smooth Glide (PA6) and Anti-Slip (rubber)
Rivet: Zinc-plated steel tubular rivet with a molded anti-rotation notch
Installation: Tap with a rubber mallet, no pre-drilling, no adhesive
Hold strength: Mechanical grip from the anti-rotation notch and tubular rivet
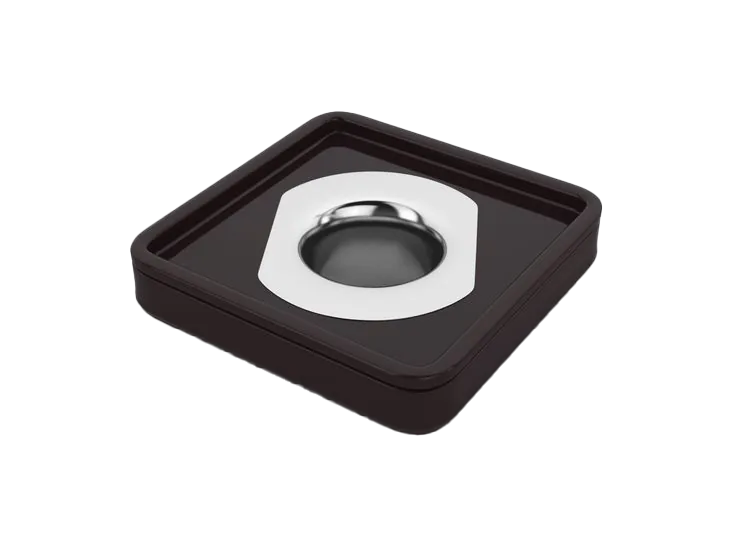
Larger sizes: The four largest (Ø 50, Ø 75, 50 × 50, 75 × 75 mm) add an internal EHBF acrylic foam layer for extra bond
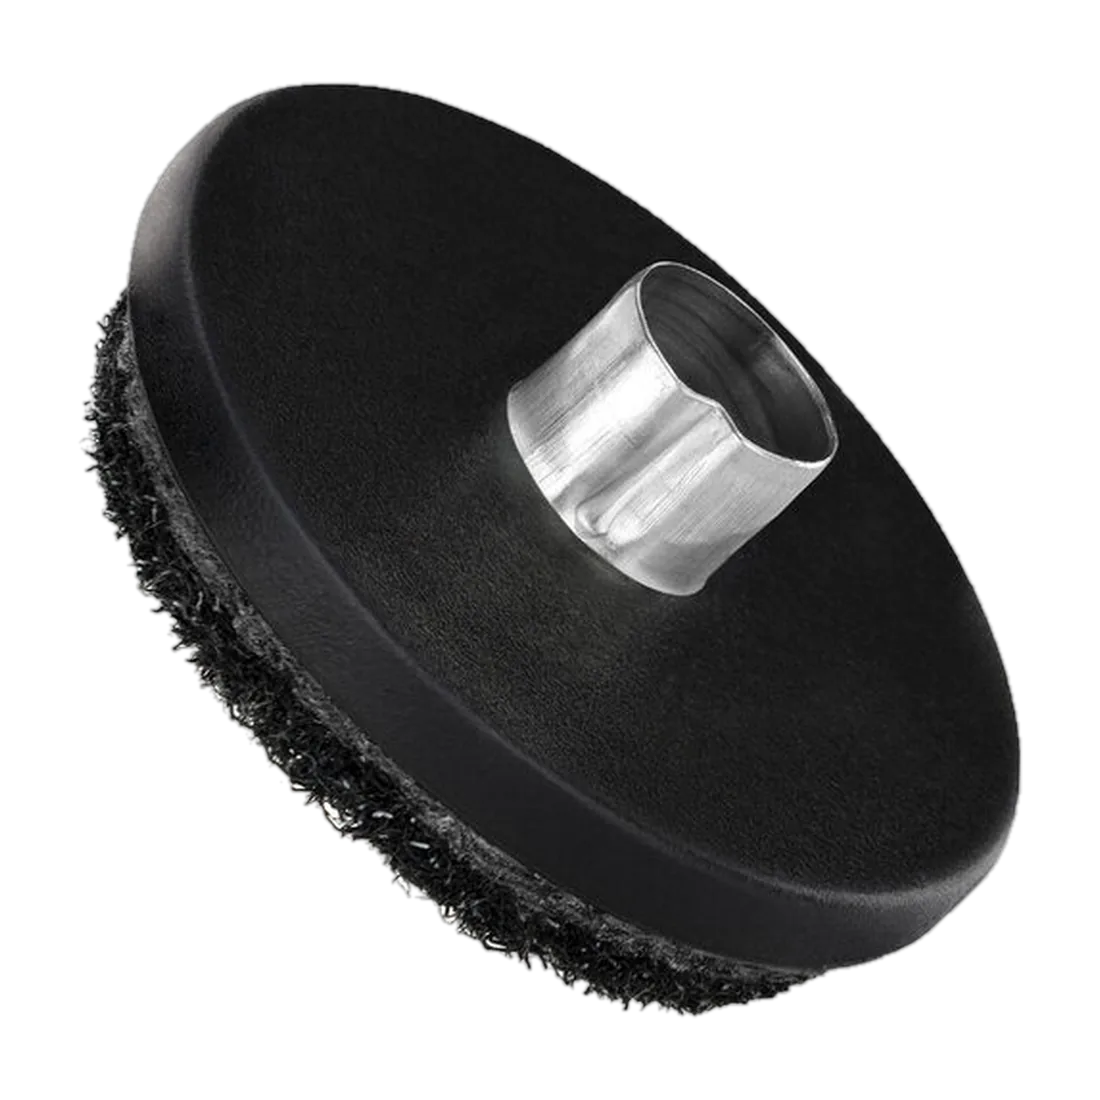
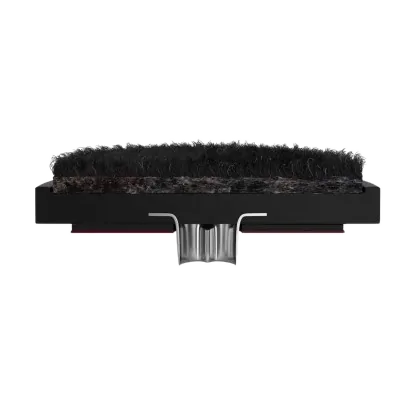
Side and top views of the rivet’s anti-rotation notch, plus how its wide head is molded into the ABS body, the bond that keeps the glide from working loose.

Anti-rotation notch (side)
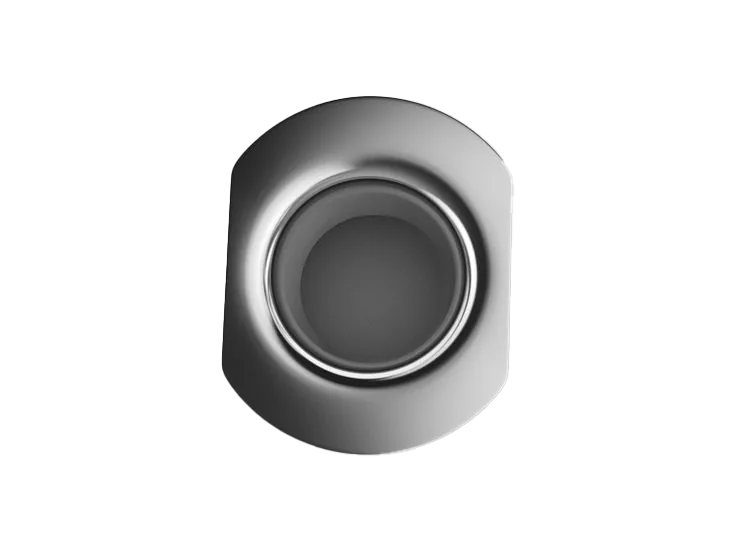
Hollow tubular rivet (top)
Molded into the ABS body
Ø 23 to Ø 75 mm. PA6 fiber on an ABS carrier.
23 × 23 to 75 × 75 mm. Corner-to-corner coverage.
33 × 19 mm. For rectangular legs and benches.
Confirm nail-on vs self-adhesive availability for each size on its product page. For an exact match, print the true-to-scale size guide (PDF) in the How to Measure section below and set your leg directly on it.
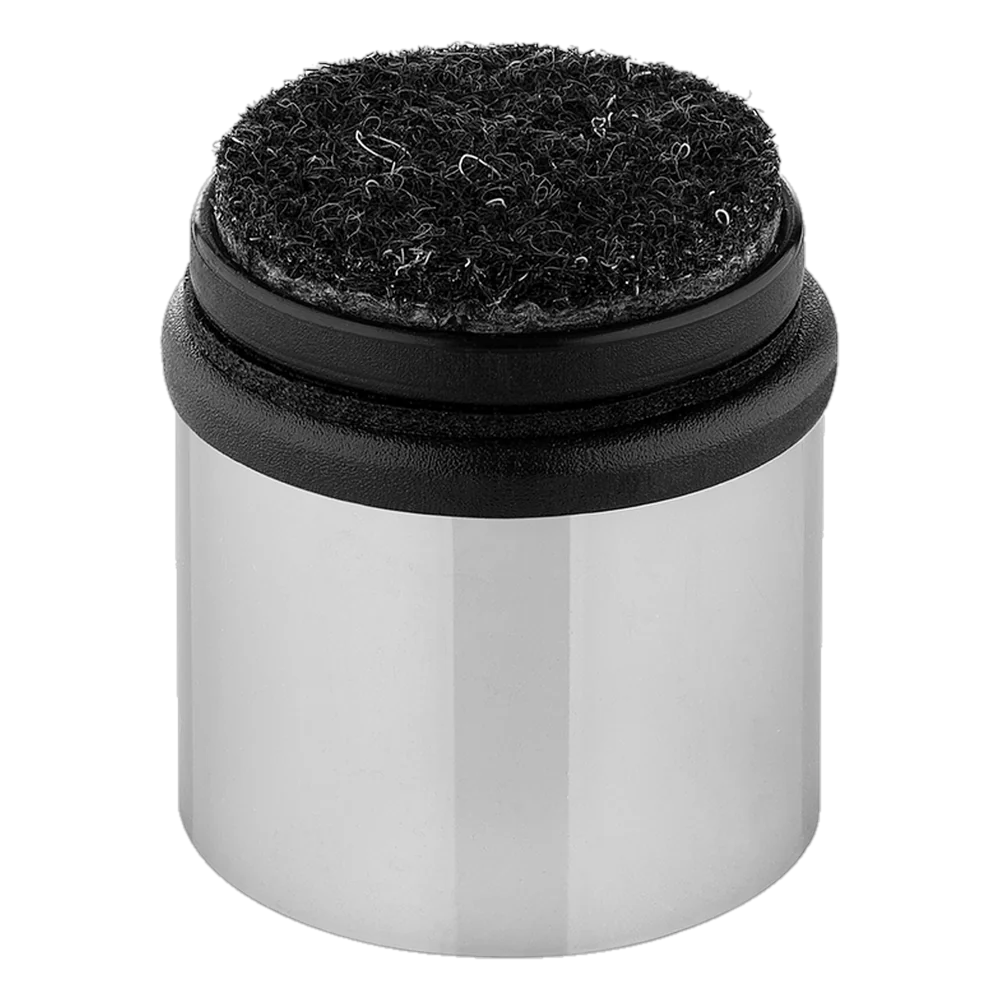
No drill, no holes, nothing to explain to your landlord. These press straight onto any clean, smooth leg base and hold. The one step people skip is the one that matters: wipe the leg with isopropyl alcohol first, so the tape grabs.
Best for: any leg that isn’t solid wood you own. Metal, plastic, hollow tube, antiques, and rentals all take self-adhesive.
Use self-adhesive glides when
✓ Furniture legs are metal, plastic, or hollow tube
✓ Wood legs but you don’t want rivet holes (rentals, antiques)
✓ You want zero-tool installation in under a minute per leg
✓ You can clean the leg base with isopropyl alcohol before applying
Self-adhesive specifications
Available shapes: Round, square, rectangular
Available surfaces: Smooth Glide (PA6) and Anti-Slip (rubber)
Adhesive: EHBF acrylic foam tape, bonds to clean smooth surfaces
Bonds to: Chrome, powder-coated steel, anodized aluminum, polished plastic, sealed wood
Installation: Press firmly for 30 seconds, then allow 48 hours for full cure
Ø 23 to Ø 75 mm. PA6 fiber on an ABS carrier.
23 × 23 to 75 × 75 mm. Corner-to-corner coverage.
33 × 19 mm. For rectangular legs and benches.
Confirm nail-on vs self-adhesive availability for each size on its product page. For an exact match, print the true-to-scale size guide (PDF) in the How to Measure section below and set your leg directly on it.
Here is the part people get backwards: both surfaces go on the same smooth, hard floors. The floor does not pick the surface, the job does. Smooth Glide lets the piece move silently. Anti-Slip holds it still. So ask one thing: do you want this furniture to move, or stay put?
For furniture that moves
Needle-punched polyamide fiber at 1,450 g/m² pile density. Glides silently across smooth, hard floors. Aligned with NWFA guidance for hardwood contact. This is the surface most furniture wants.
Best for
Floors: hardwood, tile, vinyl, laminate, polished concrete, sealed cork.
For furniture that stays in place
Natural and chloroprene rubber compound that grips smooth, hard floors. Holds furniture still when movement is the problem: boats and RVs that pitch and roll, fixed restaurant seating, polished concrete venues.
Best for
Floors: smooth, hard floors only. Same as Smooth Glide.
In short: if you want furniture to glide smoothly across the floor, choose Smooth Glide. If you want furniture to stay exactly where you put it, choose Anti-Slip. Both come in nail-on and self-adhesive mounting, in every shape and size.
Sizes are stated in millimeters with imperial conversions. The right size sits just inside the edge of the leg, fully hidden when viewed from the side.
Lay the furniture on its side or upside down. The flat face at the very bottom of the leg is where the glide will sit. That’s the surface you measure.
Use a ruler, tape measure, or calipers. Round legs: measure the diameter across the widest point. Square legs: measure one side. Rectangular legs: measure both width and length.
Many modern and mid-century legs taper, meaning the bottom is narrower than the top. Always measure at the bottom, not the top. The glide must fit the actual base it’s attaching to.
If your measurement falls between two sizes, choose the smaller one so the glide sits flush or just under the leg edge. A glide that overhangs the leg edge catches on things and lifts at the corner. A slightly tucked-under glide stays hidden and bonded.

Sizing tip: a glide that sits flush with the leg base, or slightly smaller, stays hidden under the leg edge. A larger glide overhangs and catches on things. At a size boundary, go flush or smaller. Never larger.
Prefer to measure against the real thing?
Print our size guide at 100% and hold your leg against the true-scale shapes. Works for glides and slides, nail-on or self-adhesive.
Both methods are quick. Nail-on or self-adhesive, most people finish all four legs in under five minutes, whether that is four dining chairs or four hundred restaurant chairs.
Center the furniture glide on the bottom of the leg. The anti-rotation notch molded into the tubular rivet is designed to key into the wood grain, preventing the glide from spinning later. For square and rectangular glides, align the edges with the leg edges.
Tap with a rubber mallet until the furniture glide sits flush against the wood. No pre-drilling needed. The zinc-plated steel tubular rivet separates wood fibers rather than cutting them, so the hole stays tight even after multiple replacements over the years.
Try to rotate the furniture glide with your fingers. If it spins, the anti-rotation notch molded into the rivet hasn’t fully seated into the wood grain. Give it another firm tap with your mallet until it locks in place and holds.
Set the furniture back down and push it across the floor. You should feel smooth, quiet movement with no catching or dragging. If it glides silently, you’re done.
Larger sizes
Ø 50, Ø 75, 50 × 50, and 75 × 75 mm glides add an EHBF acrylic-foam self-adhesive backing around the rivet, so they hold with the rivet and the adhesive together. Wipe the leg base with isopropyl alcohol before driving them in, so the adhesive bonds too.
Wipe the bottom of every furniture leg with isopropyl alcohol (70% or higher). This single step is the difference between a furniture glide that holds up and one that falls off within a week. Dust, oil, and finish residue all weaken the adhesive bond.
Peel the protective backing film off the furniture glide. Discard it immediately if the exposed EHBF adhesive touches anything other than the clean leg surface, contamination weakens the bond.
Center the furniture glide on the leg base and press firmly for a full 30 seconds. You want full contact with no air pockets and no gaps at the corners. Align square and rectangular glide edges with the leg edges.
Set the furniture back down gently. The weight of the furniture actually helps the EHBF adhesive cure. Wait 48 hours before heavy use or dragging. Moving furniture before the adhesive fully bonds is the number one reason self-adhesive glides come loose early.
Most floor pads still run a twenty-year-old design: a felt pad stuck to a cheap plastic disc with one drop of hotmelt glue. It holds for a few weeks. Then the felt peels at the corner, the glue lets go, and your floor is exposed again. Here is what is built differently.
Surface: PA6 needle-punched polyamide fiber, 1,450 g/m² pile density, vertically interlocked. Resists lateral shearing without delaminating. No glues in manufacturing.
Platform: Automotive-grade ABS plastic. Shock-resistant, dimensionally stable, and resistant to brittleness.
Bonding: Superglue applied to all edges and corners. Manual application, manual quality check. Resists peeling at the edges where lateral stress concentrates.
Fastener: Zinc-plated steel tubular rivet. Shallow penetration and broader grip than a standard nail. Wide head molded into ABS. Anti-rotation notch molded into the rivet prevents spinning. Available in round, square, and rectangular.
Surface: Horizontal nylon felt layers pressed together with adhesive. Layers separate under lateral force. Humidity accelerates failure because glue holds the layers together.
Platform: Brittle, low-grade plastic. Cracks easily and ages quickly.
Bonding: A single drop of hotmelt in the center of the platform. Felt peels from corners first, exactly where stress concentrates.
Fastener: Standard nail. Narrow head not molded into plastic. Only available in round (other shapes would need 2+ nails). Plastic can break loose, leaving the nail to gouge your floor.
Every furniture glide is a complete floor protection unit. Here is what each part does, and how the materials work together for silent gliding, durability, and floor protection.

Five parts, each doing one job. The rivet anchors into solid wood without pre-drilling. The ABS body carries the load. The PA6 fiber face does the gliding. Together they stay put and stay quiet.
PA6 (Polyamide 6) needle-punched fiber at 1,450 g/m² pile density and 5.5 mm thickness. Vertically interlocked fibers resist lateral shear and delamination, even under heavy daily use on hard floors.
Automotive-grade ABS (Acrylonitrile Butadiene Styrene) platform, the same material used in car dashboards. The PA6 fiber surface is superglue-bonded to every edge of the ABS platform, so the face and core hold together as one durable piece.
An engineered acrylic foam layer that distributes load across the full ABS platform, dampens vibration, and absorbs sound. That keeps gliding quiet and easy on the floor. It is fitted on nail-on glides in the four largest sizes only: Ø 50 mm and Ø 75 mm round, and 50 × 50 mm and 75 × 75 mm square.
Zinc-iron plated steel tubular rivet with a razor-sharp edge that separates wood fibers without pre-drilling. The precision-formed head is molded directly into the ABS platform, so the rivet and platform seat together as one piece.
A notch molded into the ABS platform that seats against the leg base. It stops the glide from spinning around the rivet, so the PA6 face wears evenly instead of in one spot.

Three parts, no rivet and no holes. The EHBF acrylic foam adhesive reaches full bond strength after 48 hours. The PA6 gliding face is the same one used on the nail-on range, so the glide feels identical underfoot.
Same PA6 (Polyamide 6) needle-punched fiber used in our nail-on furniture glides: 1,450 g/m² pile density, 5.5 mm thickness, vertically interlocked fibers. Superglue-bonded to the ABS platform so the face and core hold together as one durable piece. Glides silently across hardwood, tile, laminate, vinyl, and every other smooth, hard floor.
Same automotive-grade ABS platform as our nail-on line. High surface tension gives the superglue a secure bond to the PA6 fiber surface on every edge. The underside bonds to the EHBF adhesive backing with full contact. No air gaps, no weak points.
An engineered acrylic foam tape that bonds securely to any clean, smooth surface: chrome, powder-coated steel, anodized aluminum, finished wood, and most rigid plastics. It reaches full bond strength after 48 hours under furniture weight. No tools required.
These are the questions that come up most about furniture glides. If you don’t see your question, our product advisor can help. Reach out via Contact & Support, or browse the rest of the furniture glides guide for more detail.
Furniture glides are protective pads that attach to the bottom of furniture legs. Sometimes called chair glides for smooth, hard floors, they prevent scratches, scuffs, and noise while allowing smooth movement on hardwood, tile, laminate, and vinyl floors.
Yes. Properly sized furniture glides with Smooth Glide (PA6) or Anti-Slip (NR+CR) surfaces prevent scratches, scuffs, and wear on all smooth, hard floors.
Any furniture on smooth, hard floors benefits from glides: chairs, tables, bar stools, sofas, beds, and more. Anything that moves or could shift over time.
Yes. Smooth Glide (PA6) glides dramatically reduce scraping and squeaking on tile, hardwood, laminate, and other hard surfaces.
Measure your furniture leg at the base, right where the glide will sit. If your measurement falls between sizes, choose the one that sits flush or just smaller, never larger. See the How to Measure section above for the full steps.
Nail-on glides for solid wood legs. Self-adhesive for metal, plastic, or wood when you prefer no rivet holes. See Quick Decision above.
Smooth Glide for furniture that moves regularly. Anti-Slip for furniture that must stay put. See Surface Choice above.
Yes. Worn glides expose abrasive materials directly to your floor. Replace them as soon as you notice wear. Waiting risks serious floor damage that costs far more than new glides.
How long they hold up depends on use. Dining chairs pushed and pulled daily wear their glides faster than bedroom furniture that rarely moves. The PA6 surface is built to take repeated movement; when a glide wears thin enough to expose the leg or backing, replace it.
No. Furniture glides are engineered for smooth, hard floors only. On carpet, the PA6 fiber grips instead of gliding. For carpet, rugs, and mats, use furniture slides with an ABS surface.
No. Rough hard surfaces like unpolished slate, raw concrete, and textured tile are abrasive enough to wear through PA6 fiber quickly. Use furniture slides instead.
Browse the full glide lineup by type. Nail-on glides hammer into wooden legs; self-adhesive glides peel and stick to any flat base. Anti-slip versions swap the smooth surface for a rubber grip. Every size lives on its product page.
Hammered into wooden leg bases. The low-friction surface slides smoothly across any smooth hard floor.
Nailed into wooden legs with a rubber surface that grips the floor, for furniture that should stay put.
Peel and stick to a flat leg base, no tools. The low-friction surface slides on smooth hard floors.
Peel-and-stick mounting with a rubber grip surface, for legs that shouldn’t slide.
Whether you’re outfitting one dining room or a full restaurant floor, the right glide is in the catalog.
Browse other furniture guides: Slides Guide · Pads Guide · Tube Plugs Guide · Leveling Feet Guide · Sled Base Guide
Product categories: Furniture Glides · Furniture Slides · Furniture Pads · Tube Plugs & End Caps · Leveling Feet · Sled Base Glides
Business accounts: Business Solutions for volume pricing, B2B accounts, and commercial orders.